MATLAB Command Line
Click to copy the following command line to the clipboard. Then paste it in the MATLAB Command Window:
quarc_encoder_demoQUARC Encoder Demo
This example is a simple encoder test, but it demonstrates a number of important features of QUARC, such as the ability to access and quickly change hardware, multiple targets, online parameter tuning, data streaming, MAT-file logging, using Model Explorer and potentially more.

This demonstration consists of two parts. In the first part the real-time code generated from the model will be run on a local Windows target. In the second part the code will be run on a remote NI ELVIS III target with Quanser Controls Application Board connected to it using the TCP/IP communication protocol.
System Requirements
This demonstration requires hardware supported by the HIL blockset, such as the Q2-USB or Q8-USB hardware-in-the-loop card.
Configuring the Demonstration
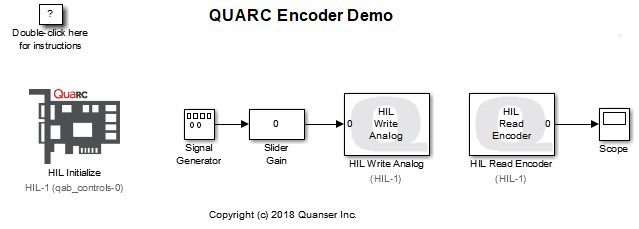
To set up the demonstration for your data acquisition card, double-click on the HIL Initialize block and select the correct board type from the Board type combo box (e.g. q2_usb for the Q2_USB, or qab_controls for the Quanser Controls Application Board for the NI ELVIS III). If you have more than one board of the same type in your computer, change the Board number field to the board you wish to use. Boards are numbered from 0 such that board 0 is the first board recognized by the HIL blockset.
 Do not run this demo if you are using a data acquisition card that do not support encoder input and analog output (e.g.
the Quanser Q3 ControlPaQ-FW). You can run the other "Using Hardware" demos in the
QUARC Targets Demos
MATLAB Command Line
Click to copy the following command line to the clipboard. Then paste it in the MATLAB Command Window:
qc_show_demos that match your data acquisition card's
capabilities.
Now wire the encoder to encoder channel #0. For the Q2-USB or Q8-USB hardware-in-the-loop cards, simply connect 5-pin DIN connector from the encoder to encoder channel #0 on the terminal board.
For convenience, this demo uses an analog output to allow controlling of a motor that the encoder is connected to. If you have a motor that can be controlled by analog signal, connnect the analog output channel #0 to the motor/amplifier.
If your encoder is not connected to any motor, you can simply turn the shaft connected to the encoder by hand.
Demonstration 1 - Running the Model Using the QUARC Target for Windows
Please note that in order to be able to run this part of the demo, you must have purchased the QUARC Target for Windows as part of your license. In addition you must have satisfied the software and hardware requirements found in the QUARC Installation Guide.
To open the model click on the "Open this model" button found on the top right corner of this page.
Open Model Explorer by selecting button from the MODELING tab on the toolstrip. You may have to make the diagram a little wider to see the full toolstrip.
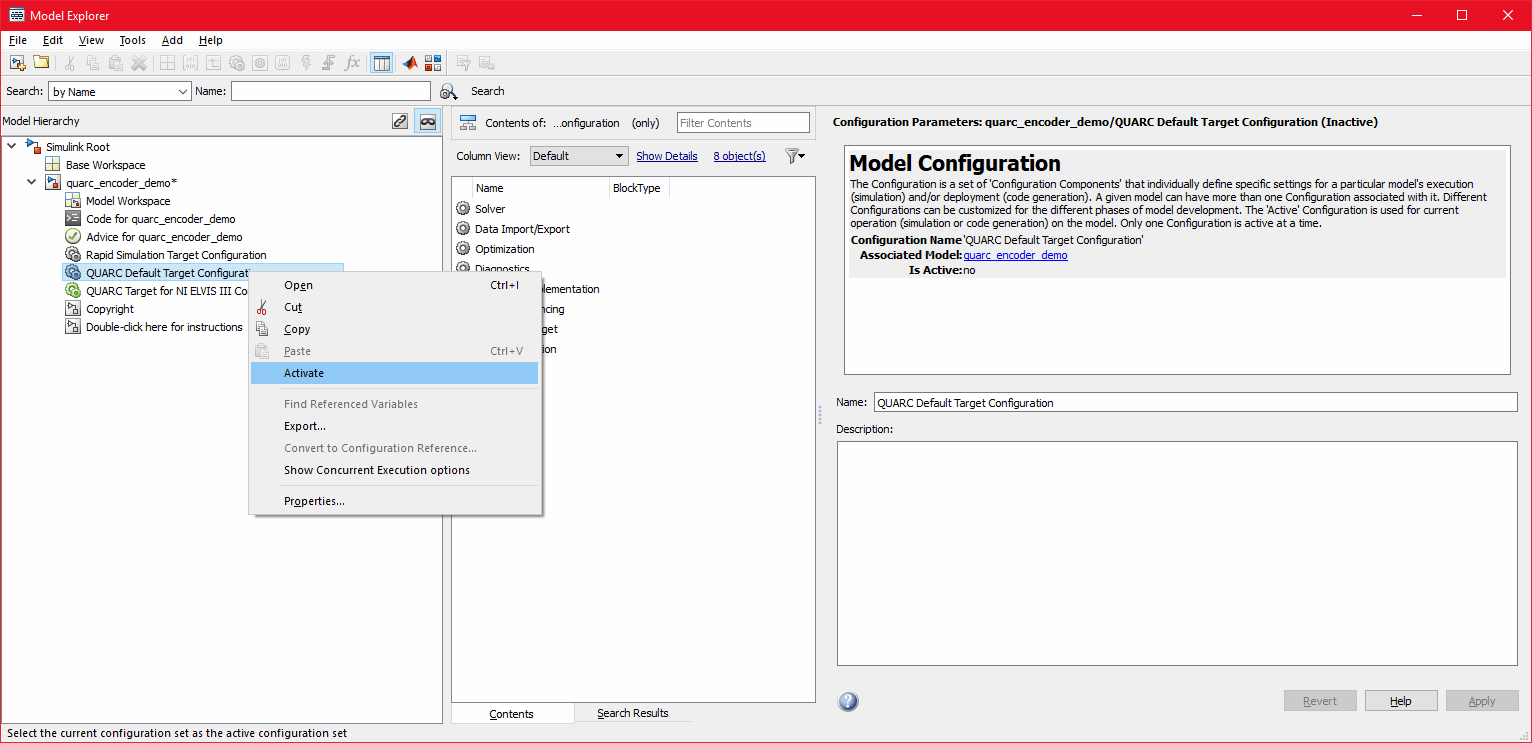
Expand the treeview item in the Model Hierarchy pane. If you do not see (Active) in front of the QUARC Default Target Configuration item, right-click on it and select "Activate" as shown below. If this configuration is already activated, do not make any further changes. Activating the QUARC Default Target Configuration indicates that you are intending to generate real-time code for your default target, which will be the appropriate Windows target if you have not reconfigured your default target type.
Close the Model Explorer.
Refer to One Step Process in QUARC Basic Procedures to build, deploy and start the model.
Double-click on the Scope block to open the Scope.
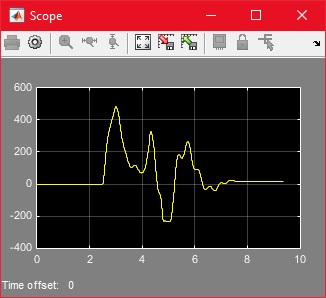
If your encoder is not connected to a motor that can be controlled via analog signal, then simply move/turn the shaft connected to the encoder, and you would see the corresponding movement shown in the Scope as shown below. Note that you might need to click on the button on the Scope in order to see the full scale of the encoder readings.
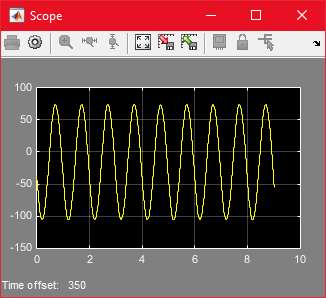
If your encoder is connected to a motor that can be controlled via analog signal, double-click on the Slider Gain block. Slowly increase the value of the Slider Gain by pressing the right arrow button. You should see that the motor start to move back and forth in a sinewave pattern, and the Scope trace would display the movement as well, as shown below. Note that you might need to click on the button on the Scope in order to see the full scale of the encoder readings.
Refer to One Step Process in QUARC Basic Procedures to stop the model.
Change the Value parameter (middle number) of the Slider Gain block back to 0.
Demonstration 2 - Running the Model Using the QUARC Controls Application Board for NI ELVIS III
In this demonstration the same model as above is used, however this time the target on which the real-time code is run is a remote NI ELVIS III platform running the Quanser Controls Application Board. Since the target is not local anymore, the TCP/IP communication protocol will be used to communicate with the target.
Please note that this demonstration assumes that the NI ELVIS III machine can be accessed via the TCP/IP protocol (note that NI ELVIS III can be connected to the host computer via USB, but still exposed a IP address. Thus TCP/IP communication can be established even through USB connection), and that you have met the software/hardware requirements for running code on NI ELVIS III targets. To see these requirements please consult the QUARC Installation Guide. Please also note that in order to be able to run this demo, you must have purchased QUARC Target for NI ELVIS III as part of your license.
To open the model click on the "Open this model" button found on the top right corner of this page.
Open Model Explorer by selecting button from the MODELING tab on the toolstrip. You may have to make the diagram a little wider to see the full toolstrip.
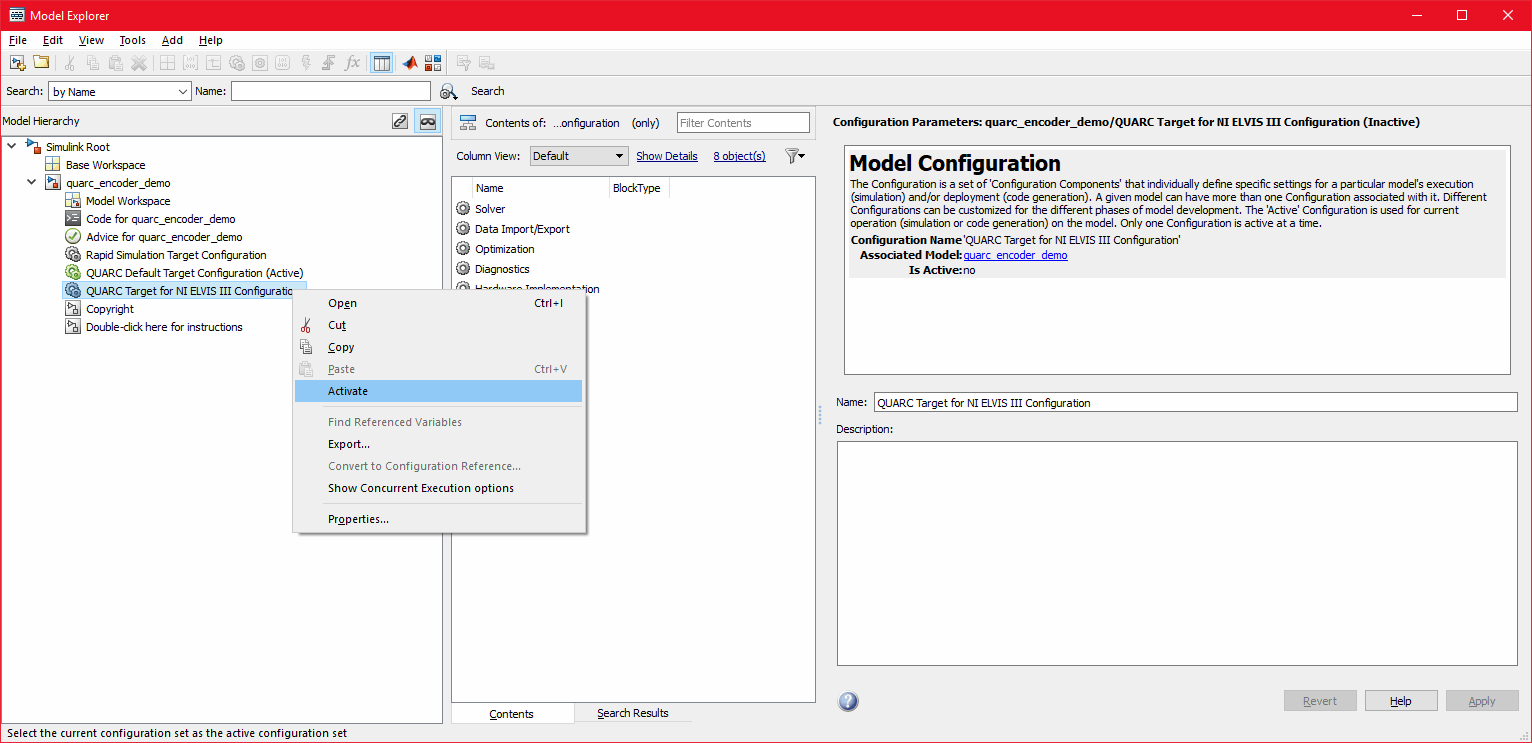
Expand the treeview item in the Model Hierarchy pane.
Right-click on the item and select from the context menu.
Close Model Explorer.
Open the QUARC Preferences dialog by selecting from the menu on the Simulink diagram.
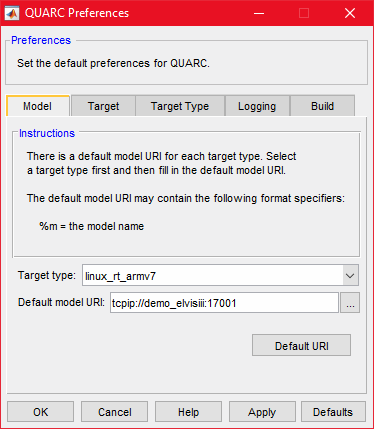
Make sure linux_rt_armv7 is selected as the Target type on the Model pane. Then enter
the following for the Default Model URI:
tcpip://HOST_NAME:17001
where HOST_NAME is the host name or the IP address of your target NI ELVIS III. For example if your NI ELVIS III's host name is demo_elvisiii, your QUARC Preferences should be set as depicted as in the figure above. The hostname or IP address of the NI ELVIS III can be obtained in NI MAX, in the System Settings pane. Please refer to National Instrument documentation regarding using NI MAX to configure NI ELVIS III.
The concept of URI's and their use in communications is discussed in Communicating with the Target. In this example, communications between Simulink and the model will occur using TCP/IP and port 17001. This step configures the default communications scheme used with the NI ELVIS III target and does not have to be repeated unless the IP address or the hostname of the NI ELVIS III change.
Refer to One Step Process in QUARC Basic Procedures to build, deploy and start the model.
Double-click on the Scope block to open the Scope.
If you simply move/turn the base motor on the Quanser Controls Application Board you would see the corresponding movement shown in the Scope as shown below. Note that you might need to click on the button on the Scope in order to see the full scale of the encoder readings.

Double-click on the Slider Gain block. Slowly increase the value of the Slider Gain by pressing the right arrow button. You should see that the motor start to move back and forth in a sinewave pattern, and the Scope trace would display the movement as well, as shown below. Note that you might need to click on the button on the Scope in order to see the full scale of the encoder readings.

Refer to One Step Process in QUARC Basic Procedures to stop the model.
Change the Value parameter (middle number) of the Slider Gain block back to 0.
Running the example on a different target
To run the example on a different target, refer to the instructions on the Running QUARC Examples on Remote Targets page.
Copyright ©2025 Quanser Inc. This page was generated 2025-11-01. Submit feedback to Quanser about this page.
Link to this page.