
Selecting a QUARC Target
Choosing the target operating system and processor for which QUARC will generate code from a Simulink diagram is as simple as choosing the appropriate system target file. The names of the system target files for QUARC targets always take the form:
quarc_<operating system>[_<processor>]
where the processor may be omitted. For example, the quarc_linux_pi_3 system target
file is used to generate code for an Pi 3 system running the Linux operating
system. Similarly, quarc_win64 is the system target file used to generate code
for a 64-bit Windows platform.
There are two principal means of selecting a system target file for a model. The first method is to use the Configuration Parameters dialog. This dialog is the easiest way of choosing the type of target and will be most familiar to those who have used Quanser's WinCon product. The second method is to use Model Explorer. Model Explorer provides more flexibility than the Configuration Parameters dialog in that it allows more than one type of target to be specified for the model.
Quanser recommends becoming familiar with the Model Explorer interface because of its many advantages over the traditional Configuration Parameters dialog.
QUARC also supports the ability to generate code for multiple targets from a single Simulink diagram. In this case, the same model can be used to generate code for more than one type of target. For example, the QUARC Windows target could be used for initial development because it can be run on the host system. Once the model is working on the host system, the same model can be used to generate code for the QUARC Linux targets in order to run on an embedded system, without losing the settings for the QUARC Windows target. Refer to Defining Multiple Configurations for more information on this important feature.
Please use the following list to refer to the topics available in this section.
Using the Configuration Parameters Dialog to Select a Target
Perform the following steps to select the target of your choice using the Configuration Parameters dialog:
Select the item from the MODELING tab.

Choose the item in the treeview on the left-hand side of the Configuration Parameter dialog as shown.
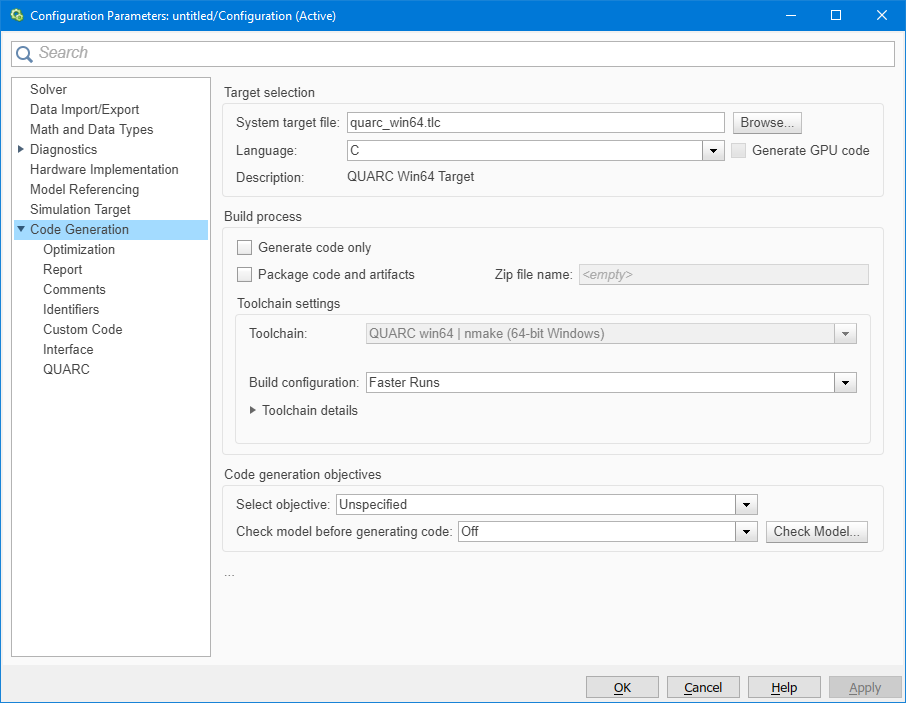
Click on the button beside the System target file field on the Code Generation pane.
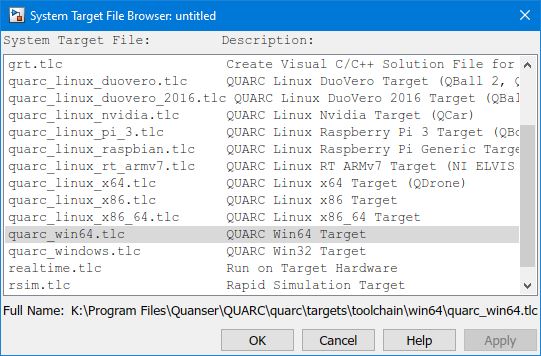
In the System Target File Browser dialog choose the desired target from the list and click .
At this point, the desired target type has been selected. Save the model. The target type only needs to be configured once for a particular model. It does not have to be set each time you wish to build code for that model.
Defining Multiple Configurations
The Model Explorer interface in Simulink allows more than one configuration to be defined for a single model. Each configuration consists of all the settings for the solver, optimizations, data import/export, Code Generation, QUARC, etc. Thus, it is possible to define a "debug" configuration and a "release" configuration, or a "Windows" configuration and a "Linux" configuration, or all of these configurations.
When a Simulink model defines more than one configuration, only one of those configurations is used at a time for simulation and code generation. The configuration currently in use is called the active configuration. Refer to Activating a configuration for more information on changing the active configuration.
To add additional configurations for your model, follow this procedure:
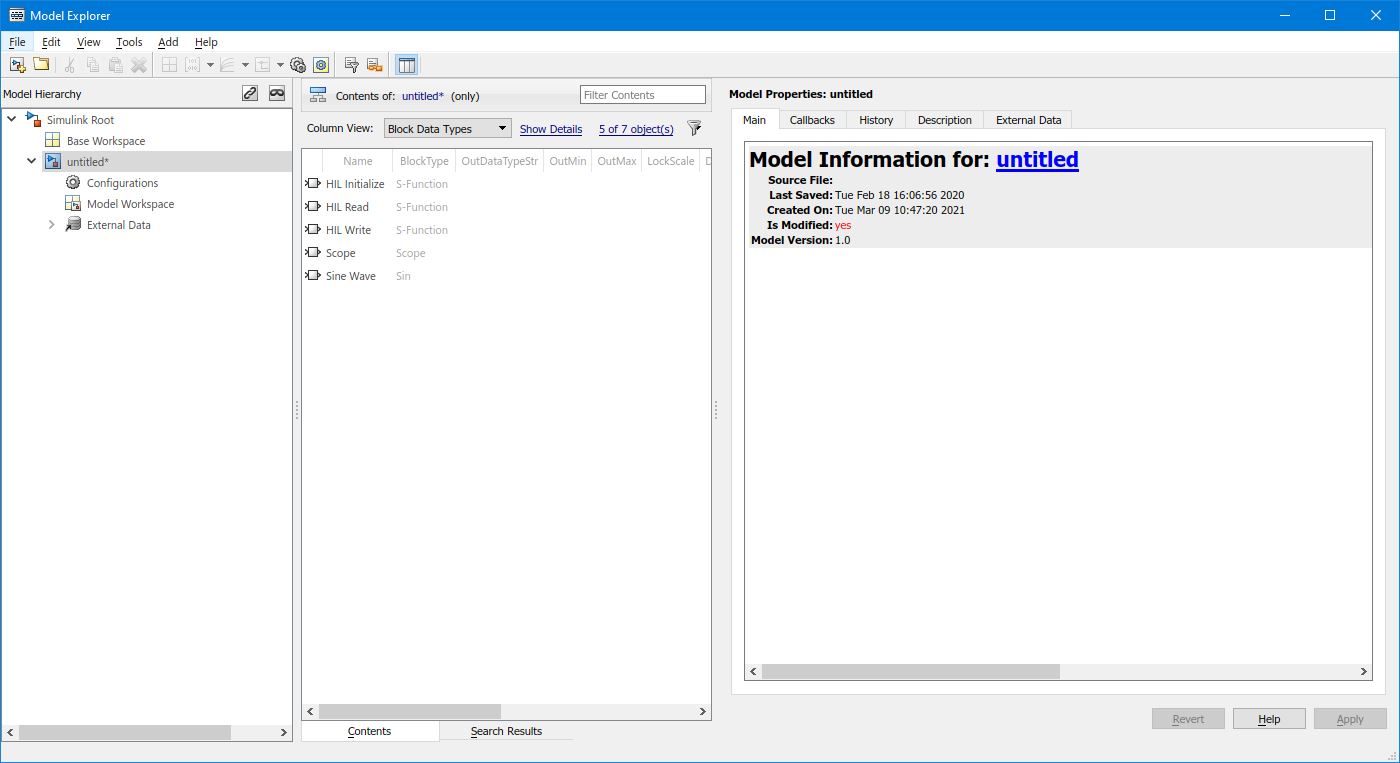
Open Model Explorer by selecting from the MODELING tab, or press Ctrl+H. You may have to make the model a little wider to see the full toolbar.

Expand the node for your model in the treeview in the Model Hierarchy pane. Make sure the model is selected in the Model Hierarchy pane.
Right-click on the model and select from the context menu.
Configurations may also be copied by right-clicking on a and choosing from the context menu. Then right-click in the model's Configurations content area and choose from the context menu.
|
→ |
|
A new configuration will now be created. You can now click on the configuration and choose the options associated with the configuration, just as you did for the original configuration. It is usually a good idea to rename each configuration to a more meaningful (and unique) name. Use the button to avoid warnings after renaming a configuration.
Activating a Configuration
When a Simulink model defines more than one configuration, only one of those configurations is used at a time for simulation and code generation. The configuration currently in use is called the active configuration. The icon associated with the active configuration is a different color than the other configurations in the Model Hierarchy pane of Model Explorer.
To change the active configuration, simply right-click on the desired configuration and select from the context menu.
Once a new configuration has been activated, simulation and code generation will use the settings in this new configuration.
Copyright ©2026 Quanser Inc. This page was generated 2026-05-13. Submit feedback to Quanser about this page.
Link to this page.