
The 3D Viewer
The Quanser 3D Viewer is the component of the Visualization Blocks that does the 3D rendering of your models. It takes care of loading the scene file, meshes, and textures, and combines them as dictated by the scene file. The 3D viewer is also the client component of the server-client model to talk to your Simulink model for the source of animation. When the viewer is opened from Simulink, command-line options are specified to automatically open the scene file and establish a communications link, but this can also be done manually from either a command line or from the viewer menus.
The 3D Viewer Window
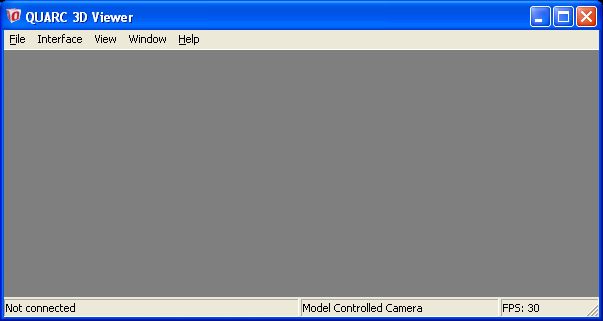
If you were to open the 3D Viewer from the Windows Start menu, then you would see something like the image below:

If the viewer is opened manually, or if the menus are enabled in the Visualization Initialize interface, then the following menus are available. If the menu is disabled in the Visualization Initialize interface and the viewer is run from the model, then it is not possible to show the menu without manually opening the viewer. This allows for a final "production" interface which limits the interface controls to the designer's intentions. If the viewer is opened manually and you load a scene file with the menu option disabled, you can show the menu by moving your mouse near the top of the viewer in windowed and full screen windowed modes to popup the menu.
File
Open Scene File
This allows you to manually open a scene file. This will automatically disconnect you from the server if you are presently connected to one.
Connect
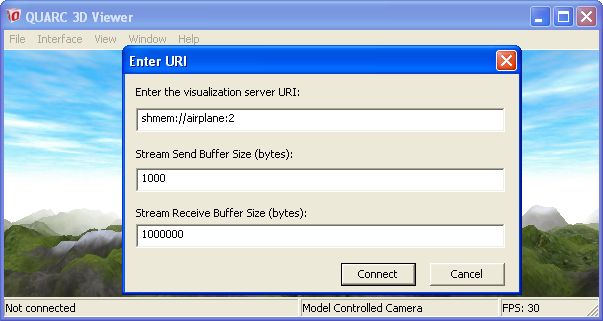
Establish a connection to a server. This will bring up another dialog as shown below:

Enter the URI to match your model. This can be shared memory (shmem), TCP/IP (tcpip), and pipes (pipe). Note that unlike setting these parameters in your Visualization Initialize, you cannot use string substitutes such as %m and %h. You must enter the full model, host name, or host IP address as appropriate for your chosen URI. Note that you must also be using the same URI type as your target model.
The Stream Send Size is with respect to the client side. At a minimum, it must be 14 bytes. The Stream Receive Size is also with respect to the client and must be 8 bytes + 4*(number of transmitted elements) so it can hold a single frame of animation data. Larger buffer sizes will help to reduce any latency between your target model and the animation update on the 3D viewer.
After entering a valid URI, the viewer will automatically disconnect from any current animation server and then attempt to connect to the new URI. The connection is persistent, so unless there is a failure from the communications hardware or the packet is in an unexpected format, the viewer will continually attempt to connect to a server at the specified URI. If the connection is lost, for instance, because your aerial vehicle flies out of communications range, then it will reestablish communications when the link is restored. The current communications status can be seen in the bottom left of the status bar.
For more information about establishing a connection to a remote target, see Establishing a Remote Connection with the 3D Viewer.
Disconnect
Disconnect from the animation server. Persistent attempts will be aborted.
Exit
Disconnect from any animation server that you are currently connected to and quit the program.
Interface
Enable Keyboard Translation Controls
If the Enable Translation using the Keyboard has been checked in the Visualization Initialize interface then this can be used to manually enable or disable the defined controls. If the interface controls have not been defined, then the default controls will be used to move the camera around the environment:
Note, when manual camera controls are used, the middle text of the status bar will change from "Model Controlled Camera" to "Manual Camera Control". If the position of the camera is driven from the model, then when you hit a manual camera control key, the camera will effectively become disconnected from that camera using the current position and orientation at the time. Hitting the escape key will return to the model controlled camera.
Enable Keyboard Rotation Controls
If the Enable Rotation using the Keyboard have been checked in the Visualization Initialize interface then this can be used to manually enable or disable the defined controls. If the interface controls have not been defined, then the default controls will be used to rotate the camera around the environment:
Note, when manual camera controls are used, the middle text of the status bar will change from "Model Controlled Camera" to "Manual Camera Control". If the position of the camera is driven from the model, then when you hit a manual camera control key, the camera will effectively become disconnected from that camera using the current position and orientation at the time. Hitting the escape key will return to the model controlled camera.
Enable Mouse Controls
If the Enable Navigation using the Mouse have checked in the Visualization Initialize interface then this can be used to manually enable or disable the defined controls. If the interface controls have not been defined, then the default controls will be used to move the camera around the environment:
Note, when manual camera controls are used, the middle text of the status bar will change from "Model Controlled Camera" to "Manual Camera Control". If the position of the camera is driven from the model, then when you hit a manual camera control key, the camera will effectively become disconnected from that camera using the current position and orientation at the time. Hitting the escape key will return to the model controlled camera.
View
Show Menu
This will switch between always showing the menu, and showing the menu only when the mouse is near the top of the viewer window.
Show Status Bar
Show and hide the status bar at the bottom of the window.
Show Dummy Actors
If dummy actors are used in the scene, this will outline their position and orientation with a unit wireframe box with a scale to match that of the dummy actor. The outline is shown in the selected diffuse color for the dummy actor.
Normal Fill
Display the model's triangles as filled polygons.
Wireframe
Display the model's triangles as lines. Back face culling will still be applied (triangles not facing the camera will not be rendered).
Points
Display only the model's vertices and show them as points. Back face culling will still be applied to those points that are part of triangles that would not be shown if rendered as complete triangles. Note, this mode can severely impact your frame rate on some video cards.
Window
Windowed
The viewer will be displayed as a normal Windows window. It can be moved and scaled, and the menu and status bar are shown as per the current visibility options.
Fullscreen Window
The viewer will be fit to the current resolution of your primary monitor. The window cannot be moved, but the menu and status bar will still be visible as per the current visibility options. The menu can be used to return to a windowed mode, or you can close the viewer using ALT-F4. You can switch to other applications using ALT-Tab, or the Windows key on your keyboard. With multiple monitors, you can also click on your secondary monitor to bring up the Windows taskbar.
Fullscreen
The viewer will be fit to your primary monitor using the resolution selected from the submenu. The window cannot be moved, and the menu and status bar will still be hidden. You can return to a windowed mode by hitting the escape key (if you are currently in manual camera control, then you will need to hit the escape key a second time).
Fullscreen Resolution
When you run the 3D Viewer, the application with automatically determine which resolutions are available for the current screen refresh rate at 32 bit color. Selecting a resolution from this list will determine what resolution is used when manually entering the fullscreen mode. If you set the windowed mode to fullscreen from the Visualization Initialize, it will first attempt to go to fullscreen based on the resolution you indicated. If that resolution is not available, then it will use a fullscreen mode at the current resolution of your monitor.
Help
About
This dialog will provide you information pertaining to the current version of QUARC installed on your computer.
Command Line Interface
When the viewer is opened automatically from the Simulink model, it uses command line parameters to control many of the options that can be manually set from the menus. If you are running the viewer on a remote system from your target, then the same process can be used to simplify setup for a potential end-user by means of a Windows shortcut, or batch file. The following command line options are available:
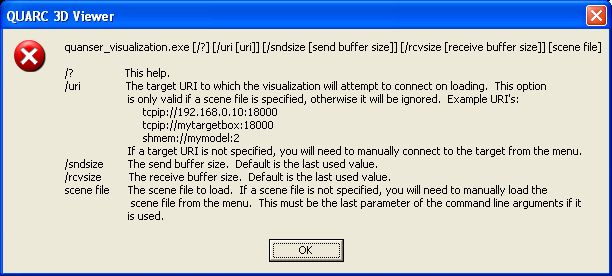
quanser_visualization.exe [/?] [/uri [uri]] [/sndsize [send buffer size]] [/rcvsize [receive buffer size]] [scene file]
/?
Shows the help dialog shown below.

/uri [uri]
Sets the URI that the viewer will attempt to connect to. This option is only valid if a scene file is specified, otherwise it will be ignored.
/sndsize [send buffer size]
The size of the send buffer in bytes. At a minimum, it must be 14 bytes. The default size is the last size used. This option is only valid if a URI is specified.
/rcvsize [receive buffer size]
The size of the receive buffer in bytes. At a minimum, it must be 8 bytes + 4*(number of transmitted elements) so it can hold a single frame of animation. The default size is the last size used. This option is only valid if a URI is specified.
[scene file]
The full path to the xml scene file. eg. c:\example\scene.xml
If only the scene file is specified, then the scene file will be loaded, but no communications will be opened. You can then manually establish a connection to an animation server. Without any command-line options, the viewer will load without any scene file or attempted URI connection. You can then manually load a scene file and connect to an animation server as described with the menu commands.

Copyright ©2025 Quanser Inc. This page was generated 2025-11-01. Submit feedback to Quanser about this page.
Link to this page.